C-AJJ4004 New road-use front anti-roll bar
This bar has been developed to complement those road cars fitted with post 1990 rubber springs. Being the softest compound yet used on the Mini in an attempt to improve comfort, they allow more body-roll. This bar will not only reduce body-roll, but also slightly reduce dive under braking and squat under acceleration. The bar is aimed at the general daily driver. For more progressive drivers it is highly recommended that its used in conjunction with rear anti-roll bar kit C-AJJ4009. By testing various settings its possible to attain a very well balanced fast road car with improved steering response to compliment the other advantages of these bars. It is made to only fit the standard diameter/dimensioned tie-rods.
SUSPENSION - Basic set-up method
Time to arrange all those agonised over, carefully selected and applied suspension components to give of their best.
Suspension - Basic set-up method
part numbers: TOOL10, TOOL11, HILO, HILO-01
Time to arrange all those agonised over, carefully selected and applied suspension components to give of their best.
This is one of those subjects viewed as a ‘black art’, largely because of lack of understanding and confusion. The confusion part is because folk encompass the whole suspension set-up deal with suspension arrangement and design, lack of understanding instilling terror at the thought of ‘fiddling’ with the suspension components. The latter also fuelled by the knowledge that expensive specialist measuring equipment is needed. Well, there is no black art – you can work the magic. More a case of a long day...
SUSPENSION - Terminology
Glossary of terms used in the suspension on the mini.
The Mini has consistently more than proven its capability in competition with very limited and cost-effective modifications based on the standard equipment fitted. Having first ensured the bodyshell (in reality little more than a complex bracket to hold suspension and driver securely in place) is well sorted out by removing all cruddy or rotten metalwork and into something like straight, square and strong we, maximising suspension stability and geometry pays dividends in the enjoyment that is driving a Mini. Understanding what the individual ingredients are helps in pursuing what you want from the experience.
Smooth Mover
Good, reliable, and consistent handling is dependent on a number of factors. At this stage, we’re concerned with clapped out or badly adjusted suspension components. Stiff, seized, partially seized or slack, sloppy, worn out suspension components will cause inconsistent, wayward, confusing and – more important
SUSPENSION - Basic Priorities
Suspension - Basic priorities for improved suspension performance.
Having studied the 'Suspension - Terminology' article you should now have a ‘job description’ understanding of previously possibly un-comprehended words associated with suspension control. Now - what to do with it? The first thing we need to establish is an order of priority before distributing hard-earned 'beer vouchers' in all directions. Fortunately, this is a good deal less complicated than is generally believed.
Despite the five main factors that control the front suspension geometry – kingpin inclination, caster angle, camber angle, track, and bump-steer – we are only really able to alter three of those easily. King-pin inclination is non-adjustable, as it’s a feature of where the swivel-pins are mounted on the hub at the factory. It will alter as other adjustments are made, but we can do nothing easily about correcting/optimising it independently, as these are fixed in position on the swivel hub.
Brakes - Fitting Discs and Required Ancillaries
What you actually need for the disc/drum conversion is pretty straightforward. Disconnect the steering arms, top and bottom swivel-pins, CV joint, and flexible brake pipes at the subframe - that’s it. There are, however, a number of ancillaries to consider.
Basics
Basics Fitting discs designed for the Mini is easy enough. Just make sure you use CV gaiters for the disc-brake set-up - these have a different bellows shape to stop the gaiter rubbing the inside of the hub. The drum type will rub, then split, shedding grease all over the place. Moly grease is mighty mucky stuff to deal with and doesn't assist braking at all! A tip for racers - to stop the gaiters over-expanding when getting very hot and imitating the aforementioned, put either a decent sized split pin or (my favorite) a piece of very small bore pipe - as in the type supplied with WD40 aerosols, etc. - under the retaining strap on the drive shaft. This allows air to escape and return,
Brakes - Rear brake bias adjustment
When altering the front brake set-up away from the standard installation, it invariably alters the amount of rear brake bias needed to re-balance the cars brake balance.
The problems start occurring when folk graft alternative brake set-ups onto the front of their Minis. Be this 7.5" discs onto a previously drum-braked model, or going from current standard disc set-ups to one of the 4-pot varieties. The question then is 'what bore size rear wheel-cylinders do I need?' Unfortunately this isn't straightforward. Actually, that's not strictly true - more on this later. The pressure developed in the lines determines brake effectiveness - aside from disc size, pad type, co-efficient of friction, etc. that is. Understanding this may assist in choosing which way you should go for your particular set-up.
The basic facts you need to remember when dealing with brake pressures is how they are affected by the components you use.
Gearbox - Limited Slip Diffs, What they're about
Modified engines producing more power generally induce owners to drive with greater verve, particularly when competing in one of the many motorsport disciplines.
Terminology -
LSD - Limited Slip Differential
In fact this isn’t isolated to modified Minis. Owners of relatively standard machinery competing in a discipline or merely out on a country lane blast are subject to the same determination. The more verve/determination applied, the more of a struggle keeping your Mini on the designated track becomes. Generally the problem is down to grip - or more precisely the lack of it.
Suspension modifications and extensive twiddling of geometry settings can provide improvements in stability, both for straight lines and turn in/mid corner performance. But even throwing bucket loads of cash at super high grade dampers, and the odd arm/leg/lung handed over to ‘professional’ chassis tuners doesn’t solve the particular grip problem we’re interested in here - corner exit/acceleration grip, or
SUSPENSION GEOMETRY - Buy the right parts to do the job correctly
It is baffling to see so many companies advertising mini suspension geometry parts in kits that are a waste of time as they rarely complete the job on either the front or the rear.
Engine transplants - Ancillary parts
Engine mountings are a whizz to fit as the Mini ones fit straight onto any of the other units. Just remove the Metro/AA/1300GT ones and swop the mounts over from the Mini unit. If they’re split, fit new ones, they’re cheap.
Terminology -
BBU - Big Bore Unit
SBU - Small Bore Unit
NOTE: This information covers transplanting large-bore engine units into small-bore engined Minis. For further information for exact differences between pre-A+ and A+ units, see relevant separate article.
Engine mountings and steady bars.
Engine mountings are a whizz to fit as the Mini ones fit straight onto any of the other units. Just remove the Metro/AA/1300GT ones and swop the mounts over from the Mini unit. If they’re split, fit new ones, they’re cheap. If using the AA/1300GT unit - it's advisable to cut off the 'wings' on the front plate that carried the engine mounts on the radiator end.
KNOW YOUR MINI TYPE
This is to help you understand which mini you own from a spare parts point of view. Officially There were only Mk1/Mk2 and Mk3 on sales brochures but the Mk4 was introduced by Keith Dodd in 1976 to help people understand the main parts changes. From here we eventually got to MK7
What mini do you own-Make your Mark from this list Confused what mini you own,...
Wheels & tyres - Bigger wheel fitment consideration
Predominantly 13-inchers, but 12s as well, the main thrust of the questions being 'what do I need to do?'
This subject is a regular visitor to the message board and 'Knowledge' section of Mini Magazine for whom I write - fitting bigger wheels. Predominantly 13-inchers, but 12s as well, the main thrust of the questions being 'what do I need to do?' along with 'which wheel arch extensions will I need?' The answer has always been somewhat 'clipped' purely because of the space availability issues both in the magazine and on the message board, so something a little more detailed was required. Although the Mini suspension was designed around the use of 10-inch wheels with cross-ply tyres, a quick dash through history reveals that fitment of these bigger wheel sizes isn't a recent, 'modern' application.
Wheels & tyres - Problems with 12-inch wheels rubbing
Having applied Hi-Los and some smart 165/60/12 profile tyre shod12 x 5-inch ally rims, discussions get around to a subject that has cropped up a zillion times in the Knowledge, at shows, my e-mail address, etc. - just why does this combination cause the tyre to hit the front arch?
To be more exact - why does the tyre just rub, twang the plastic arch off, or foul the arch to the point of bending it? Even if the genuine, original fitment 'Cooper' alloy 12-inch rims are used with the 165/60/12 tyres? Well, it's all a question of alignment - either subframe to body or suspension to subframe. When trying to source/cure the problem, many folk have discovered that shim plates have been used between the front panel to subframe teardrop mounting and the subframe - and wonder if the car has been in an accident and been 'fudged', so could be causing the problem.
C-AJJ4004 FRONT ANTI-ROLL BAR FITTING INSTRUCTIONS 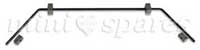
FOR USE WITH STANDARD TIE BARS ONLY
This bar has been developed to complement those road cars fitted with post 1990 rubber springs. Being the softest compou
C-AJJ4006 ADJUSTABLE FRONT RACE ANTI-ROLL BAR
Instruction Sheet (Please read in full before installing anti-roll bar)
The mounting blocks are to be fixed at each end of the bar under the front of the subframe where there is a double thickness of metal close to the forward tie-bar brackets. Loosely assemble the blocks to the bar, one positioned between the locating rings - offer the bar up to the lower front edge of the front subframe.
C-AJJ4008 ADJUSTABLE REAR ANTI-ROLL BAR FITTING INSTRUCTIONS
Jack rear of car up, and place securely on axle stands, positioned to allow maximum access to rear subframe/rear radius arms area. Remove rear exhaust hanger to exhaust clamp or un-hook rubber loop on late type cars. Using suitable saw, cut off centralising tab from bottom center of subframe rear cross member. Remove rear wheels and brake drums. Remove upper most and rear most brake back plate to radius arm nuts and bolts.
21A1091 - Fitting Instructions - Heavy Duty Adjustable Tie Rods
These rods have been produced to improve car stability when cornering and braking and to facilitate easy adjustment of caster angle. Manufactured from a high-grade material in a much bigger diameter they are less susceptible to bending than the standard items.
C-AJJ3363 - SPHERICAL ENDED ADJUSTABLE BOTTOM ARMS
These are to replace the standard bottom arms to facilitate easy adjustment of camber angles.
To fit, pace car safely on axle stands, remove front wheels to ease access, remove tie bar bolt where it joins the bottom arm, break bottom hub ball joint on outer end of arm, then remove the inner arm pivot pin. Adjust the spherical rod end by screwing in or out to set it to a similar length from the centre of the inner pivot point to the centre ...
C-STR631 & 632 Offset bottom arm bushes
Aftermarket bushes for suspension and subframes have been a topic of conversation for some time now. Many folk have become obsessed about fitting brightly coloured plastic (polyurethane) bushes in place of any rubber bush they can find in the belief they will improve the performance of whatever bush has been replaced. Whilst it is true that polyurethane is harder wearing - and therefore longer lasting - than rubber in many applications it is not necessarily the best material for the application every time. Polyurethane has greater abrasion resistance and is stiffer for a similar hardness, is much cheaper to produce (and therefore sells at lower cost) and can be produced in a wide variety of gaudy colours.
C-AJJ4024 Brake Line conversion kit
This pipe kit is for converting Metro 4 pot callipers with dual feed pipes to a single feed as used on minis.
It is necessary however, to check that this is permitted by the legislation in the country in which the vehicle is to used. To ensure maximum...
HILO - ADJUSTABLE MINI SUSPENSIONFITTING INSTRUCTIONS
Suitable for all Minis with “dry” rubber cone suspension, including vans, Travellers and Riley/ Wolseley saloons.
General Information
These specialized and RAC FIA homologated suspension components are designed to allow the ride height of all Minis with “dry” suspension to be easily adjusted. In addition, the diameter of the rubber cone support lip is larger than the standard cone to increase effective spring rate. This makes them suitable for fitment in all the following cases:-
ROAD CARS - For load carrying and towing to optimise handling and adjustment.
RALLY CARS - Increase height for rough forestry stages then lower for smooth tarmac.
RACE CARS - Stiffen and lower the suspension as far as possible but can still be raised for bumpy circuits.
|